Overview
Use this tutorial to learn how to move around your workspace. What you’ll use:- Projects for the main work area.
- Collections for grouping related records.
- Assets for files, metadata, notes, and relationships.
- Single-click a row to inspect it in the sidebar.
- Double-click a row to open it.
- Use the path above the list to see where you are.
- Select rows to show actions such as Copy, Cut, Paste, and Permissions.
- You only see projects, collections, and assets you are allowed to access.
- Browser examples show the normal workspace flow.
- Code examples are included for users who want to inspect the same data from Python.
Technical details
Technical details
The Python SDK covers transfers and metadata. The code examples for browsing
use the public REST API because the SDK does not include list/retrieve methods
for the full hierarchy.
Select and inspect
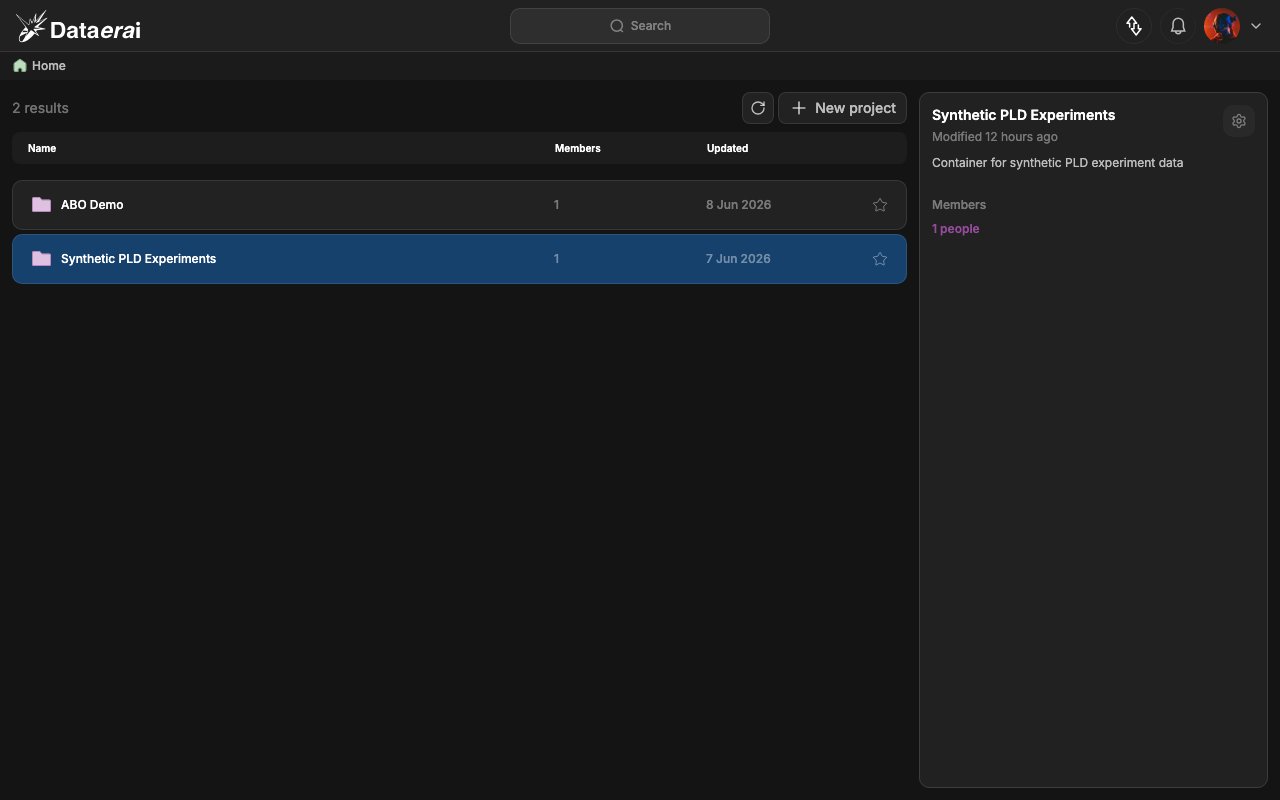
A single click selects an item and opens its detail sidebar — a quick way to inspect something without leaving the list. In the app- Sign in. The workspace opens at Home, listing your projects in a table
with columns Name, Members, Updated and a
<n> resultscount. - Single-click a project row (e.g. Synthetic PLD Experiments). The row
highlights blue and the detail sidebar opens on the right, showing the name,
Modified … ago, the description, a Members label with
<n> people, and a settings gear.
DATAERAI_SERVER to your
Dataerai site and DATAERAI_TOKEN to an access token for your account.
Drill into a project
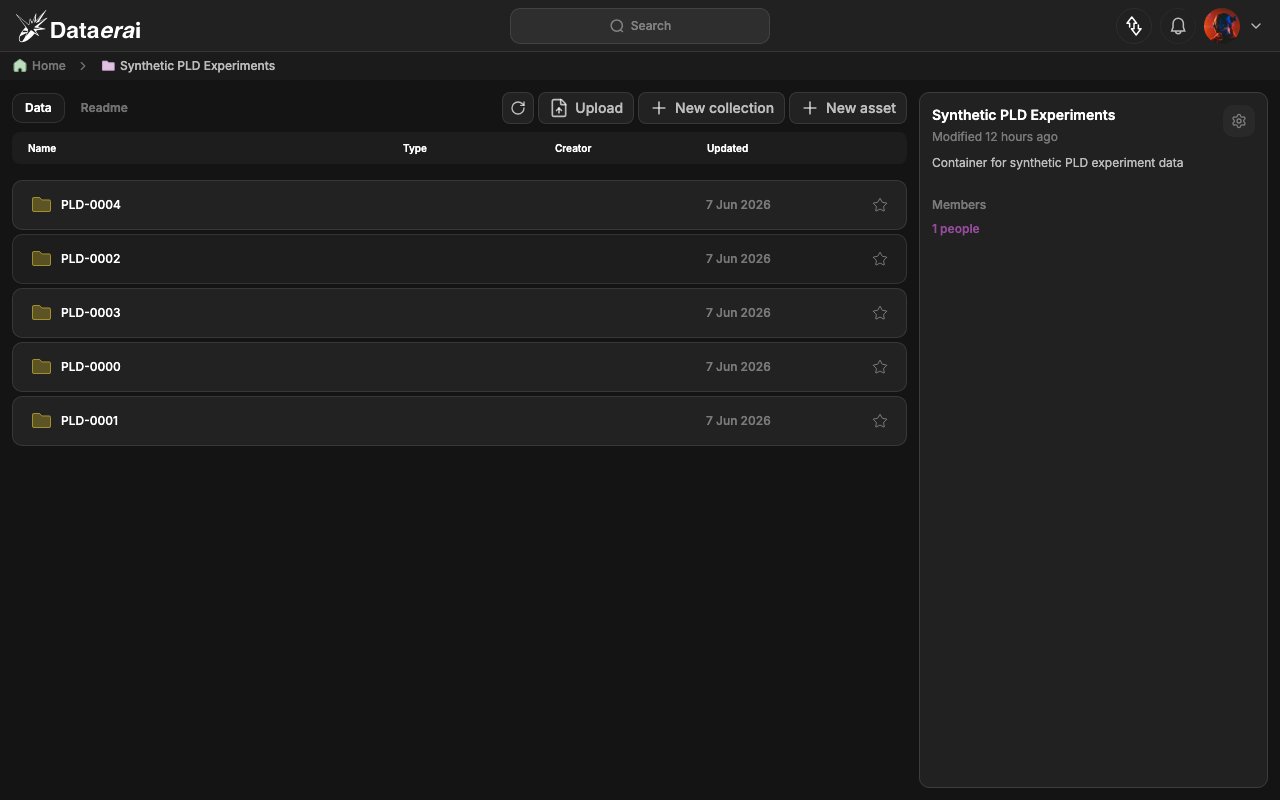
Double-click a project to open it and see its collections. In the app- Double-click the project row. The list opens that project.
- The list now shows the project’s child collections with columns Name, Type, Creator, Updated, and the toolbar gains the Data / Readme tabs plus Upload, + New collection, and + New asset buttons.
Technical details
Technical details
Each project carries a
root_collection_id: the hidden root that holds its
top-level collections and assets. root_collection_id is null if you can’t
see the root, and collections form a DAG, so parent_ids may list several
parents.Into a collection — the assets
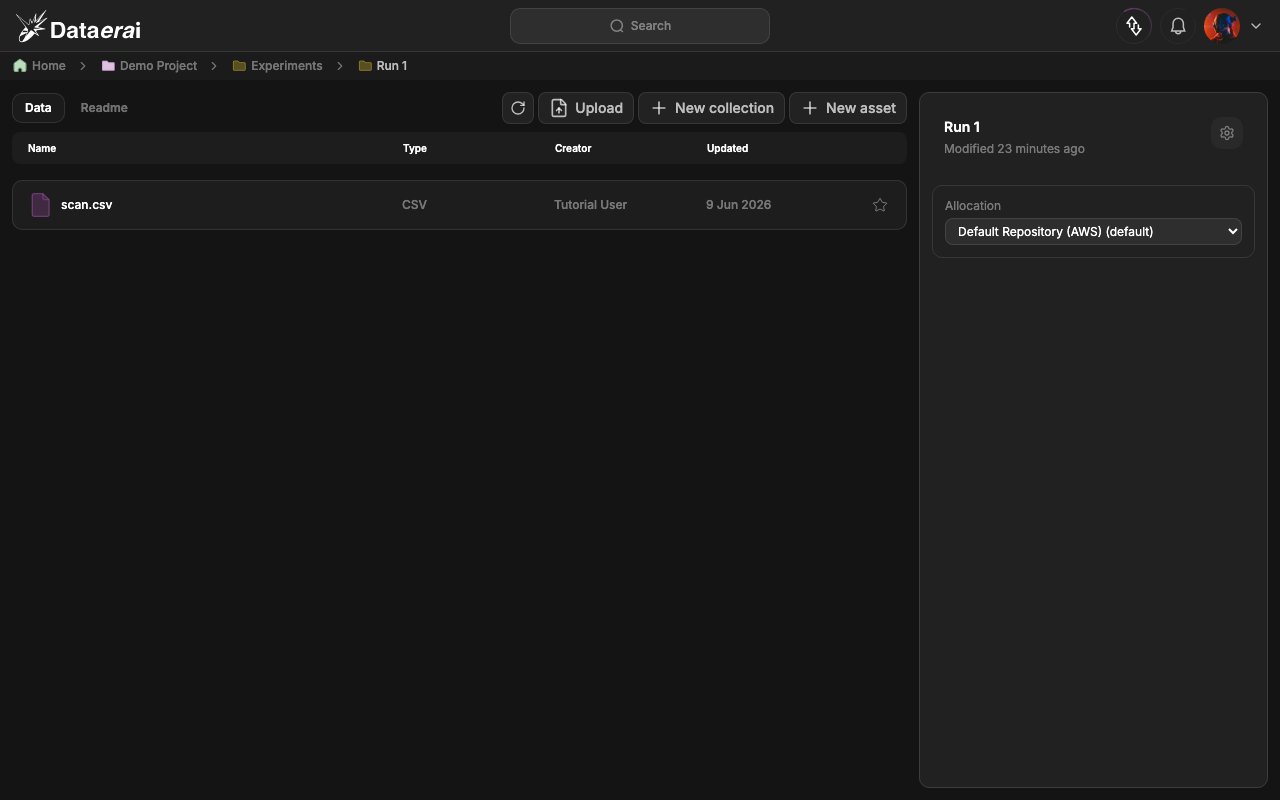
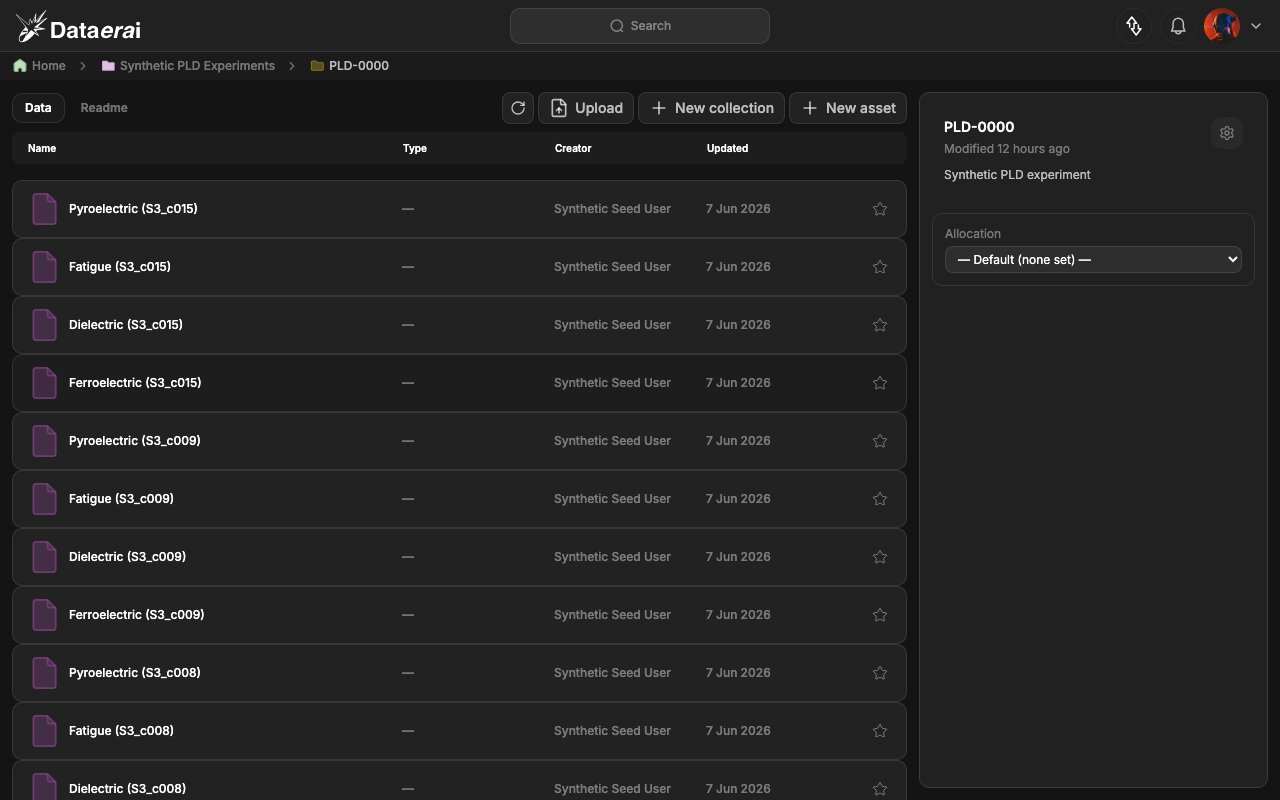
Double-click a collection to see its assets (the leaf of the hierarchy). In the app- Double-click a collection row. The path above the list updates to show the project and collection you opened.
- The list now shows that collection’s assets with columns Name, Type, Creator, Updated.
Technical details
Technical details
The page of assets is in the JSON body, but the cursor/has-more metadata lives
in the response headers:
X-Page-Limit, X-Has-More, and X-Next-Cursor.
Pass X-Next-Cursor back as the cursor param for the next page. Default
limit is 100, max 1000. current_content is null if you lack read-content
access.Asset detail & the selection toolbar
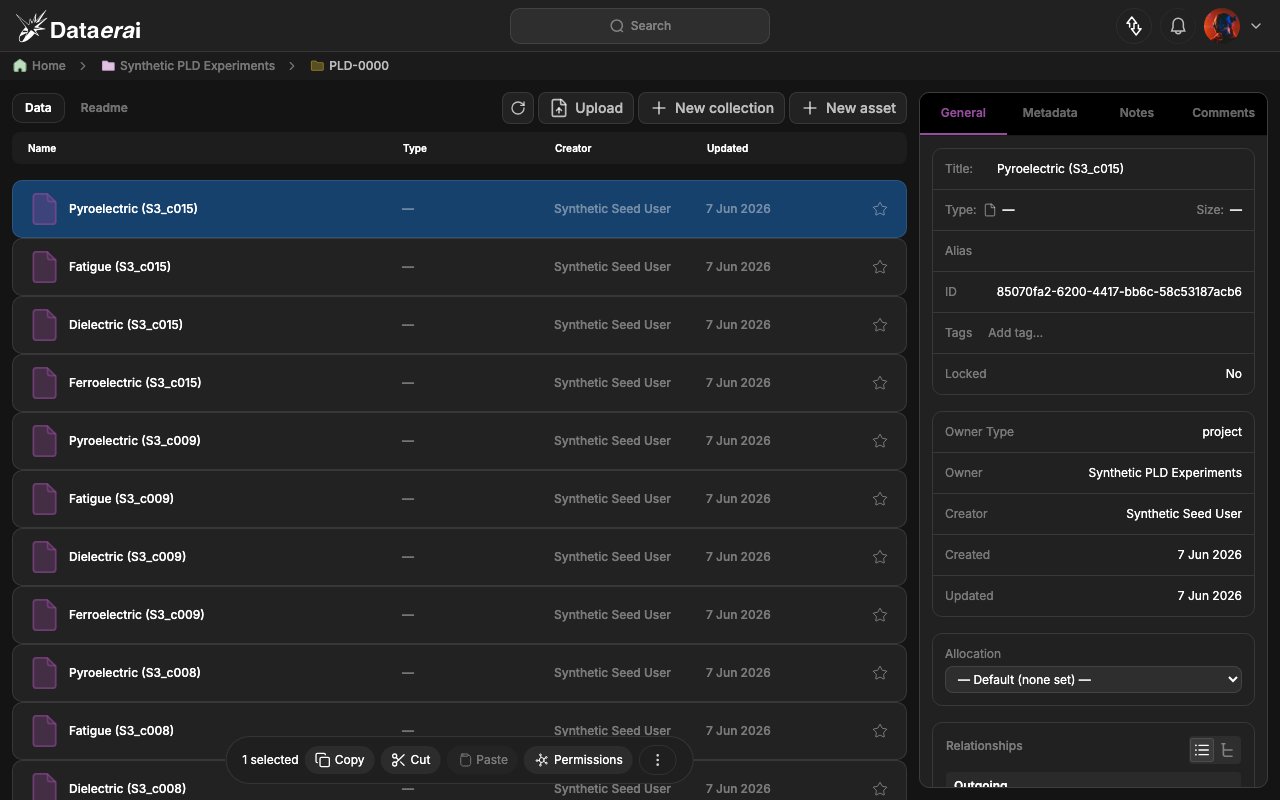
Select an asset to open its full detail panel, and use the floating toolbar to act on a selection. In the app- Single-click an asset row. The detail sidebar shows the record with four tabs: General, Metadata, Notes, Comments. The General tab lists Title, Type, Size, Alias, DID (the asset’s auto-minted persistent identifier, with a View DID document button), Tags (with an Add tag… input), Locked, Owner Type, Owner, Creator, Created, Updated, an Allocation dropdown, a Relationships card (add and browse provenance links — see Provenance & relationships), and a Citation panel (copy or download a citation in BibTeX, RIS, APA, MLA, or Chicago).
- With one or more rows selected, a floating toolbar appears centered at the
bottom reading
<n> selectedwith Copy, Cut, Paste, Permissions, and a ⋮ (More actions) menu (Download, Copy Link, Edit, Delete, Provenance, Annotate, Unlink).
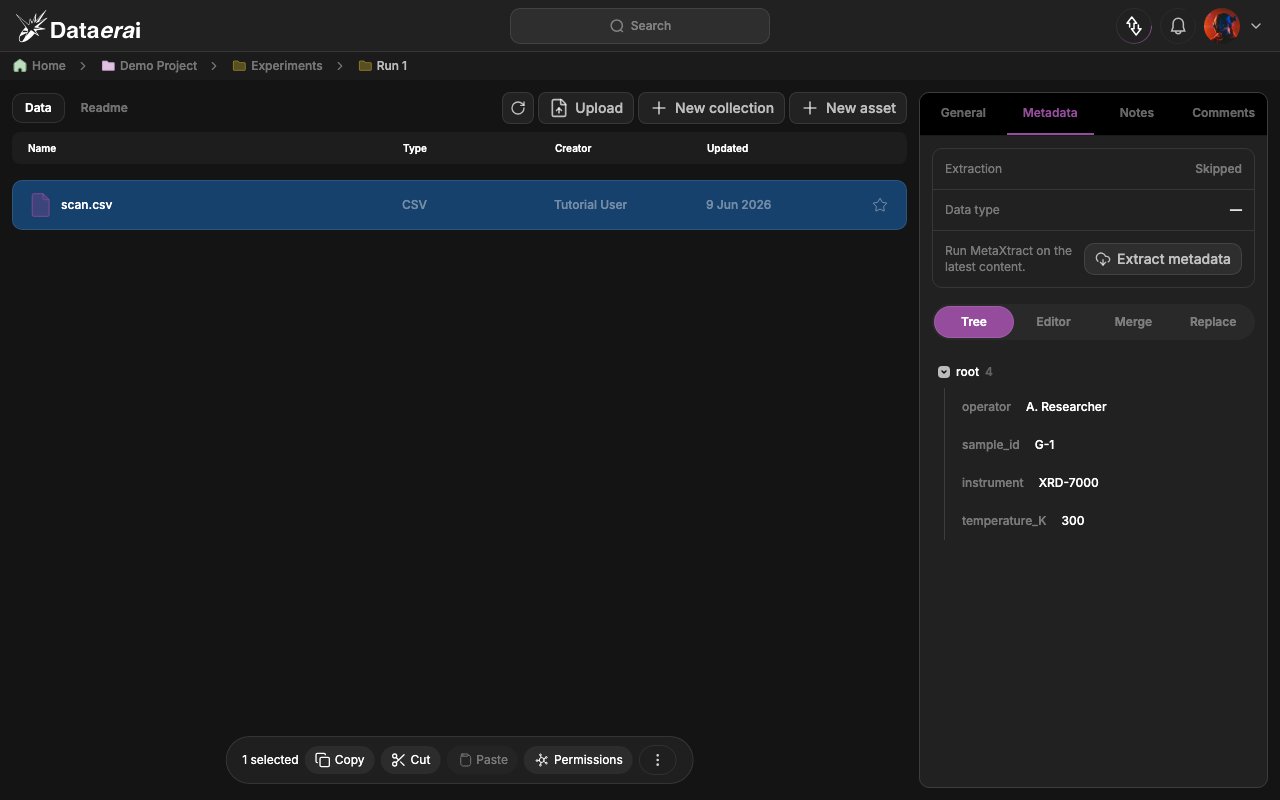
- Click the Metadata tab to see the asset’s metadata tree (the user
metadataplus anycurrent_content.extracted_metadata).
current_content.files, and the Metadata tab is metadata +
current_content.extracted_metadata).
Navigation paths & shareable links
Every view can be shared or bookmarked from the browser. Use the path above the list to jump back up to a project or parent collection. In the app- The path above the list shows where you are, such as Home, then the project, then the collection. Click any part of the path to jump straight to that level.
- Copy the browser URL to share or bookmark the exact view you’re looking at.