

- What raw data or sample led to this result?
- What analyses or derived records came from it?
- Can a collaborator follow the chain end to end?
- Create two example records.
- Link them with a typed relationship from the asset sidebar.
- Browse relationships in the asset sidebar.
- Switch between list view and tree view.
- Read and write the same relationship from code.
- Add a relationship from an asset’s General tab — choose a target asset, a relationship type, and an optional analysis mode.
- Remove a relationship you created.
- View existing relationships, including links created during data import.
- Use list view for a compact read or tree view for a visual chain.
Technical details
Technical details
You can also read and write an asset’s links over the REST API:
GET /api/assets/{id}/relationships/ merges incoming and outgoing links, and
POST /api/assets/{id}/relationships/ creates a new outgoing link.Set up: log in and create a project (from code)
The setup below uses the public REST API to create a project for the example. SetDATAERAI_SERVER to your Dataerai site and DATAERAI_TOKEN to an access
token for your account.
Create two related records
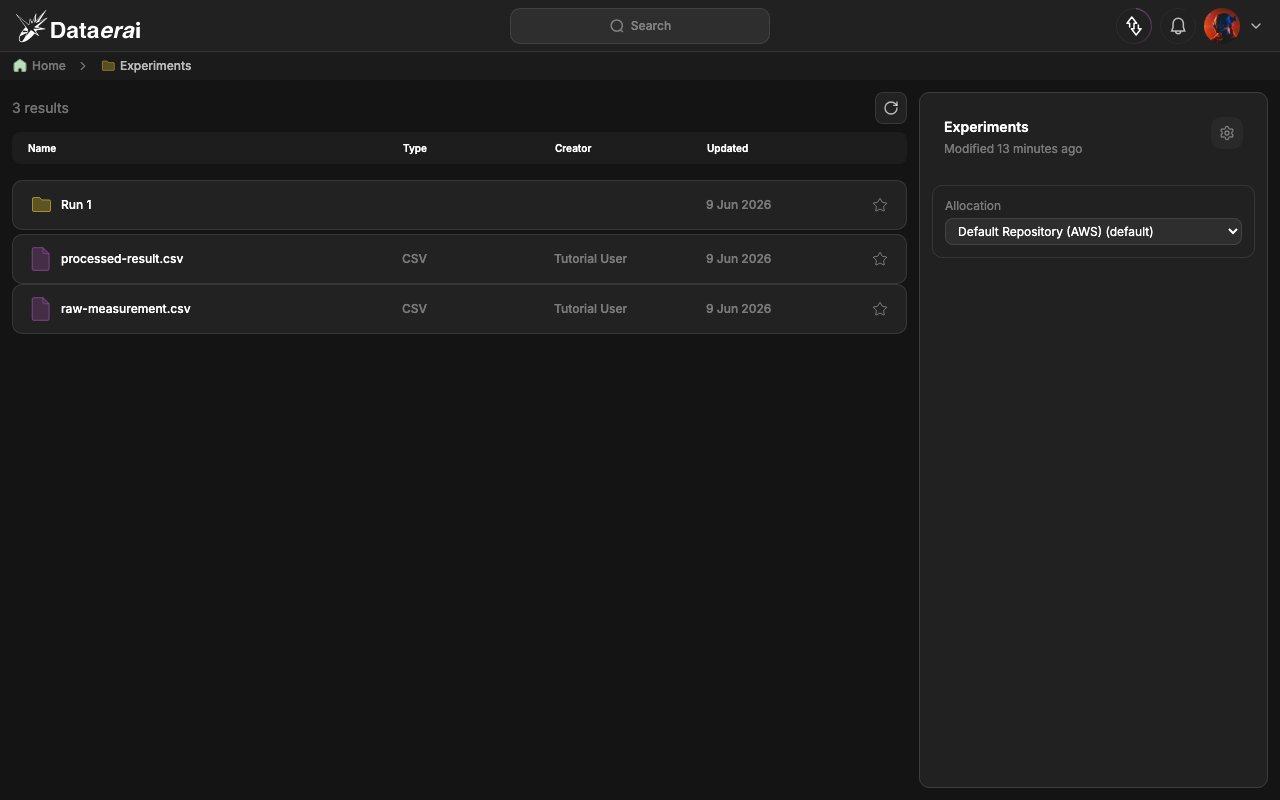
Provenance needs two records to connect: a source record and a derived record. Here we create a growth run and an XRD scan of that run. In the app- From Home, click New project (or open an existing project) and double-click a collection to open its asset table.
- Click Upload and add a file for the source record (e.g. Growth run G-1), setting any tags you want to carry onto the asset.
- Repeat for the derived record (e.g. XRD scan of G-1). Both rows now appear side by side in the collection’s asset table (columns Name, Type, Creator, Updated).
Technical details
Technical details
The code uses
POST /api/assets/. The dataerai SDK has no generic
create-asset method; it creates assets through upload(), which needs a file.Link them: add a typed relationship
Now connect the two records with a directed relationship. You create the link from the derived record (the XRD scan) to the source record (the growth run), so the lineage reads “XRD scan derived from growth run”. In the app- Open the project and double-click the collection to reach the asset table.
- Single-click the derived record’s row (e.g. XRD scan of G-1) to open its right detail panel on the General tab.
- Scroll to the Relationships card and click the + (Add relationship) button in its header. An inline form opens.
- Fill the form:
- Target asset ID (UUID) — paste the source record’s ID (the asset you are linking to). You can copy an asset’s ID from its General tab.
- Type — a free-form relationship type, such as
derived_fromoranalysis_of. Types are humanized in the display (derived_from→ Derived From). - Analysis mode (optional) — pick from the dropdown: (no analysis mode), Non-destructive, Altering, Destructive, In-situ, Ex-situ, Invasive, or Non-invasive.
- Click Add. The new link appears in the card immediately. To remove a link you created, click the ✕ next to an Outgoing row (only the link’s source can delete it).
POST /api/assets/{id}/relationships/. The
asset in the URL is the link’s source, and to_asset_id is the target.
Technical details
Technical details
Only the link’s source (the asset you posted to) can delete the link, which
matches the ✕ affordance shown on Outgoing rows in the UI.
View an asset’s lineage
With the link in place, you can read and browse the provenance.Technical details
Technical details
The API merges outgoing and incoming links, computing
direction relative to
the asset you ask about.- Sign in to your Dataerai site.
- Open the project and double-click the collection to reach the asset table.
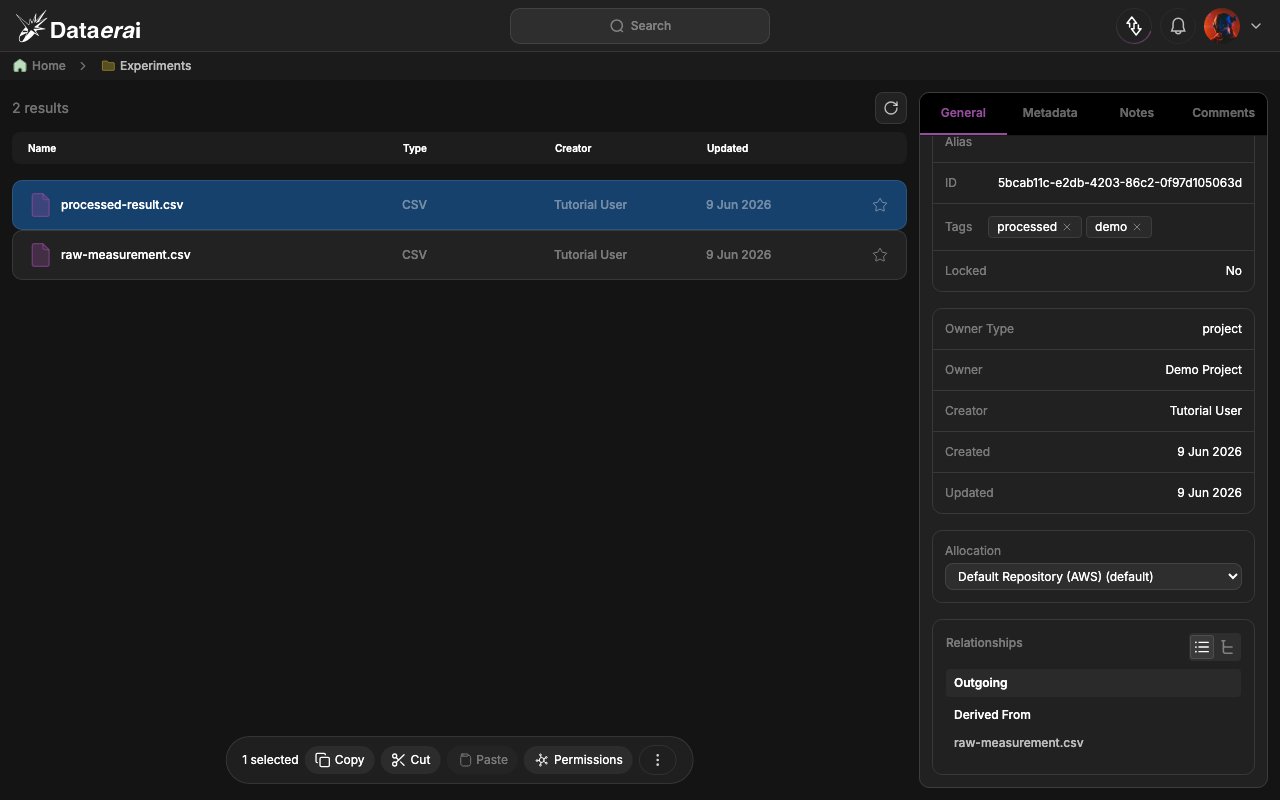
- Click the derived record’s row (e.g. XRD scan of G-1). The right detail panel opens on the General tab.
- Scroll to the Relationships card at the bottom of the panel. In the default
List view the link appears under Outgoing → Derived From →
Growth run G-1. (Types are humanized:
derived_from→ Derived From.)
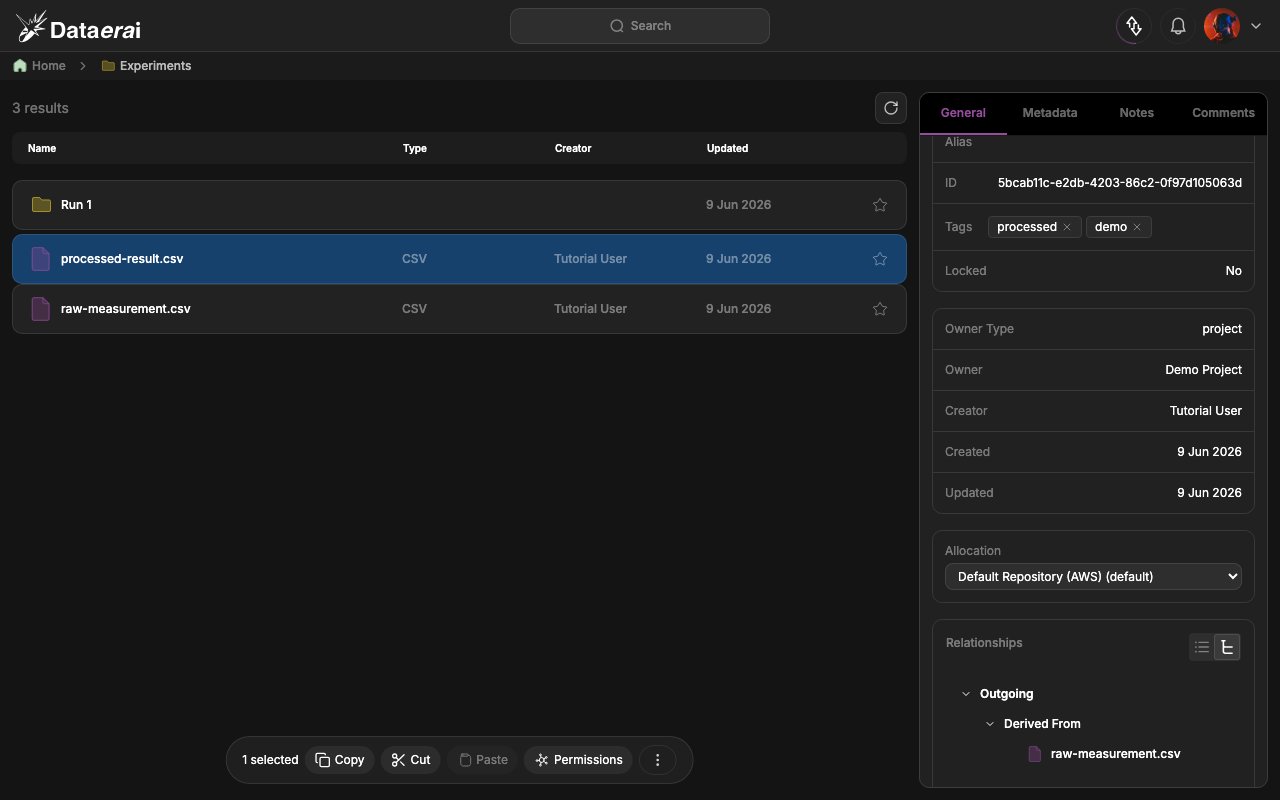
- Click the Tree view toggle (the button to the right of the Relationships header) to see the same link as a collapsible provenance graph. Click a related-record node to peek that asset and hop along the chain.
direction is computed
relative to the asset in the URL, and related_asset is the other asset in each
link.
A richer, real provenance graph
The tutorial environment includes a synthetic dataset (Synthetic PLD Experiments) whose records are already linked into a multi-step workflow — samples, growth runs, and measurements connected bycreated_sample, analysis_of, prepared_from, step_of, and more. It is a
good place to see provenance fan out beyond a single edge.
In the app
- From the home view, double-click Synthetic PLD Experiments, then a
PLD-xxxxcollection. - Click a record with several links — a Sample (Sxx) or capacitor record — and open the Relationships card on the General tab.
- Switch to Tree view to see the Incoming/Outgoing branches grouped by type fan out into a real lineage graph.
Next steps
- Advanced (graph) search — query the lineage you build here with relationship-aware searches.
- Programmatic workflows with the SDK