

Overview
Use this tutorial when you want to move files into or out of Dataerai. You’ll learn how to:- Upload a file or folder into a project.
- Add tags and upload settings before transfer.
- Watch transfer progress.
- Download the file again.
- Use the Upload dialog for browser uploads.
- Use row actions to download an asset.
- Use the transfer tracker to watch progress and troubleshoot failures.
- Use the desktop app, CLI, or Python SDK.
- Transfers can resume if interrupted.
- Multi-file and directory uploads are supported.
Technical details
Technical details
File bytes move through the Dataerai transfer clients, not through plain JSON
API responses. Programmatic upload and download use the SDK or CLI.
Set up: log in and create a destination project
The setup creates a project to upload into and keeps its name as well as its id. In the web app you’d click New project on Home instead.Upload data
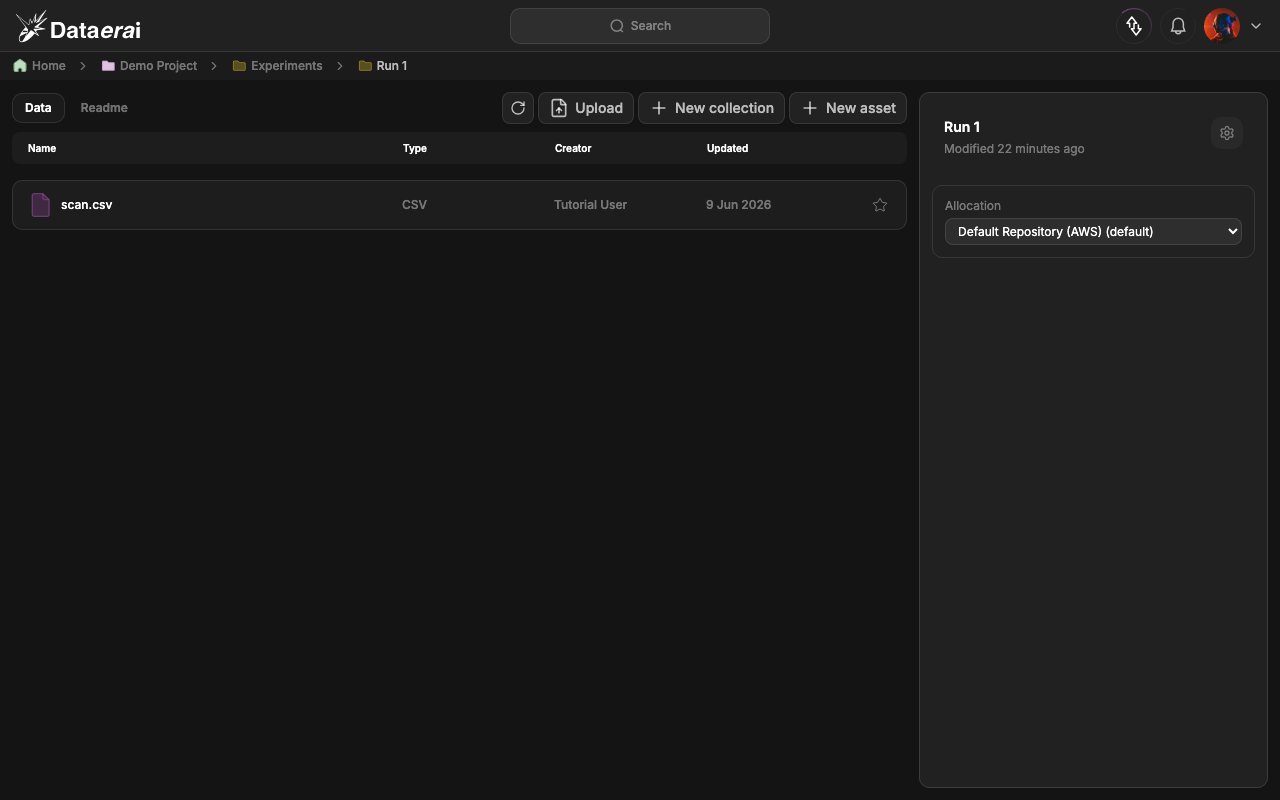
Get a file into a project’s collection — from the app or from code. In the app- Log in and on Home double-click a project to open it, then drill into a collection to reach its workspace (e.g. Synthetic PLD Experiments > PLD-0000).
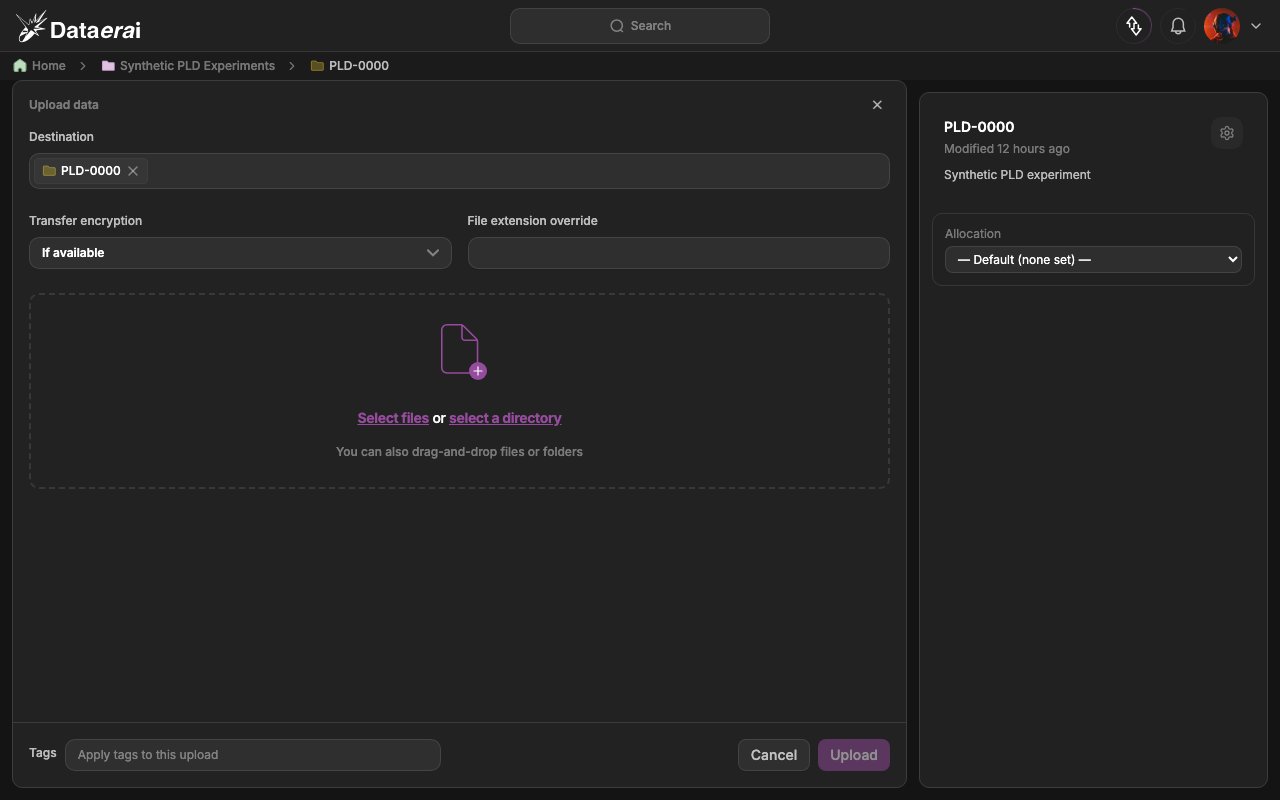
- Click Upload to open the Upload data dialog. The Destination chip shows the current collection.
- Use Select files, select a directory, or drag-and-drop. Optionally set Transfer encryption (default If available), a File extension override, and Tags.
- Click Upload.
Track your transfers
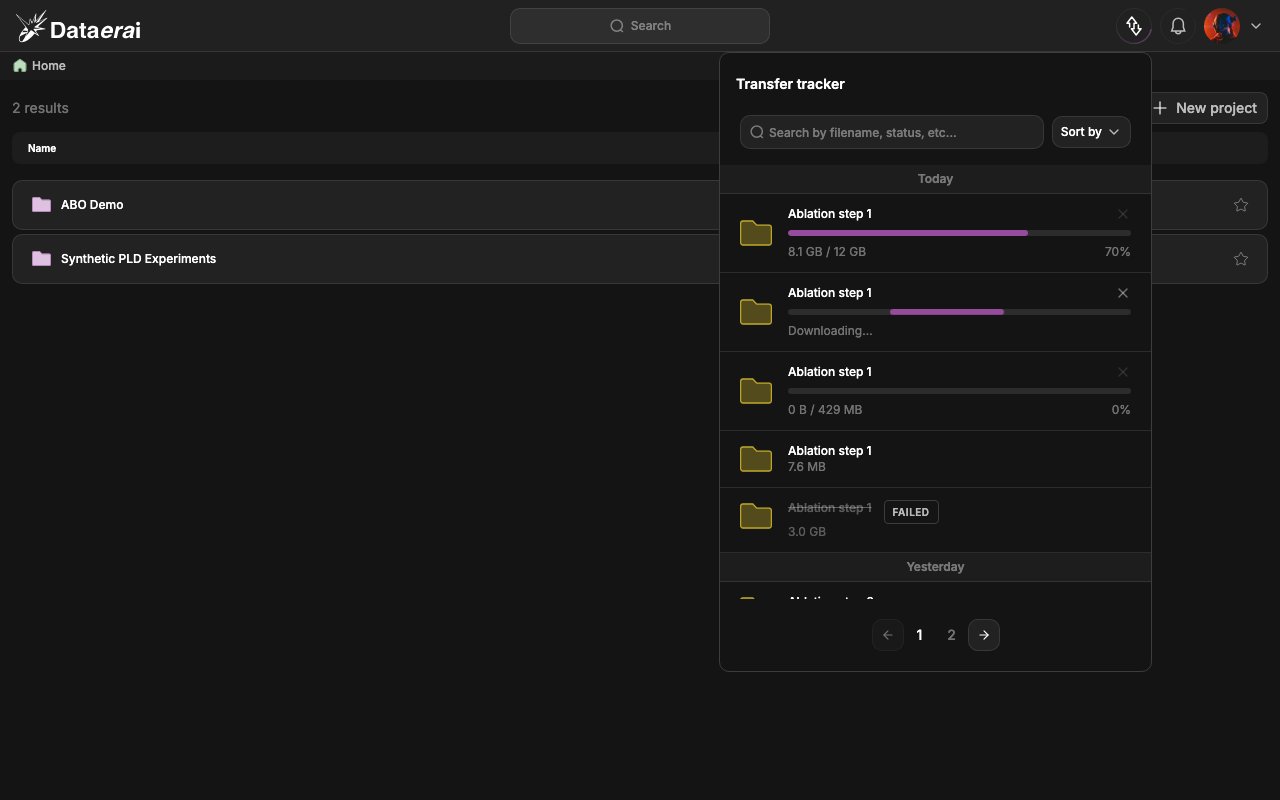
Every upload and download is recorded so you can watch and audit it. In the app- Click the transfer-tracker icon in the top bar.
- The Transfer tracker panel lists transfers grouped by Today / Yesterday with live progress bars and %, a Downloading… state for in-flight downloads, and a FAILED badge on failures. Search by filename or status, sort, and page through your history.
Technical details
Technical details
The REST API exposes content metadata, including filenames, sizes, and the
uploading -> available status. It returns JSON metadata only, not file
bytes.Download data
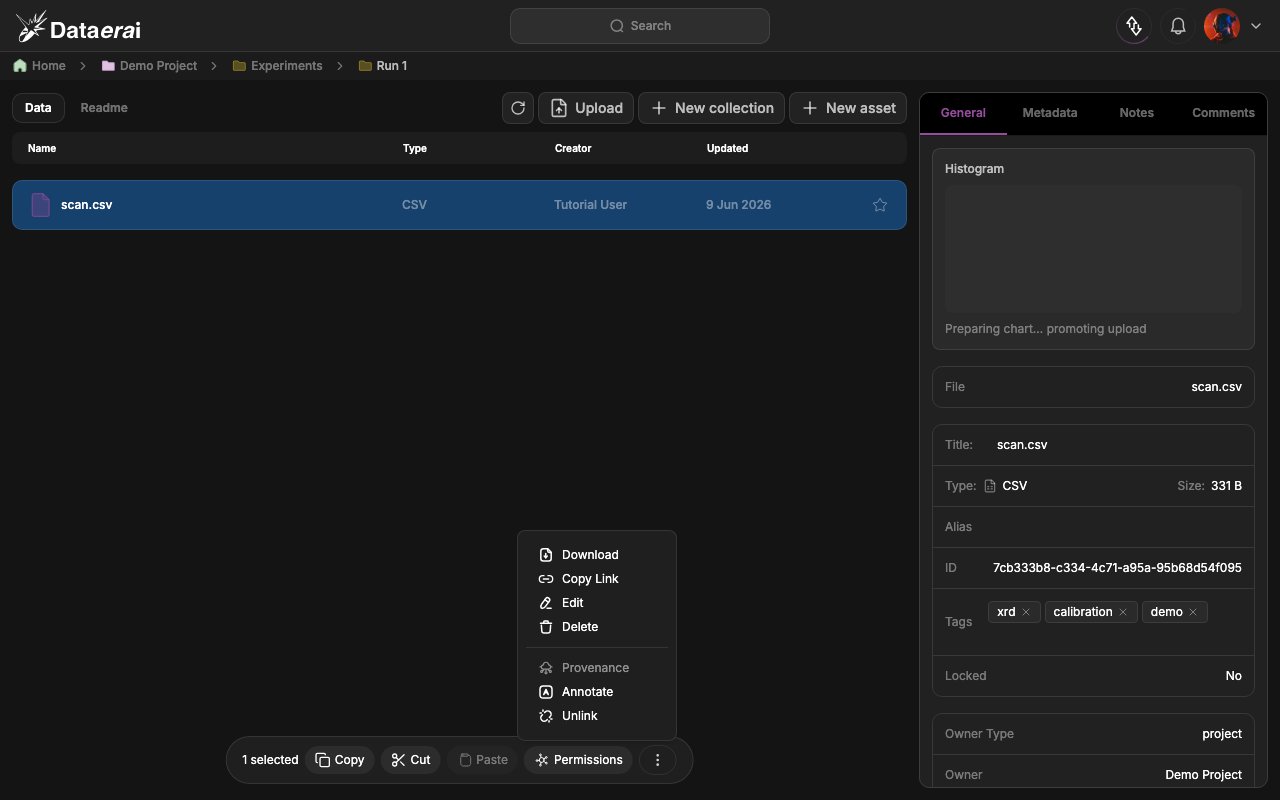
Fetch the asset back to a local folder and read it to prove the round-trip — from the app or from code. In the app- In the collection workspace, select the uploaded asset row.
- Either right-click the row or open the selection toolbar’s More actions menu.
- Click Download. (Download is enabled when you have Read access to the asset’s content and no collection is in the selection.) The resulting transfer then shows in the Transfer tracker as a download.
DataeraiClient.download fetches the asset’s latest available content into a
directory you provide. We read the downloaded file back and print its content to
confirm the round-trip:
Technical details: how downloads move bytes
Technical details: how downloads move bytes
The byte transfer never flows through the JSON REST API. Dataerai creates a
tracked transfer, streams bytes with resume support, and marks the transfer
complete when the client finishes. The SDK and CLI do all of this for you;
there is no plain REST byte endpoint to call with
requests.