

- One person.
- A group.
- Everyone who can sign in, when public access is allowed.
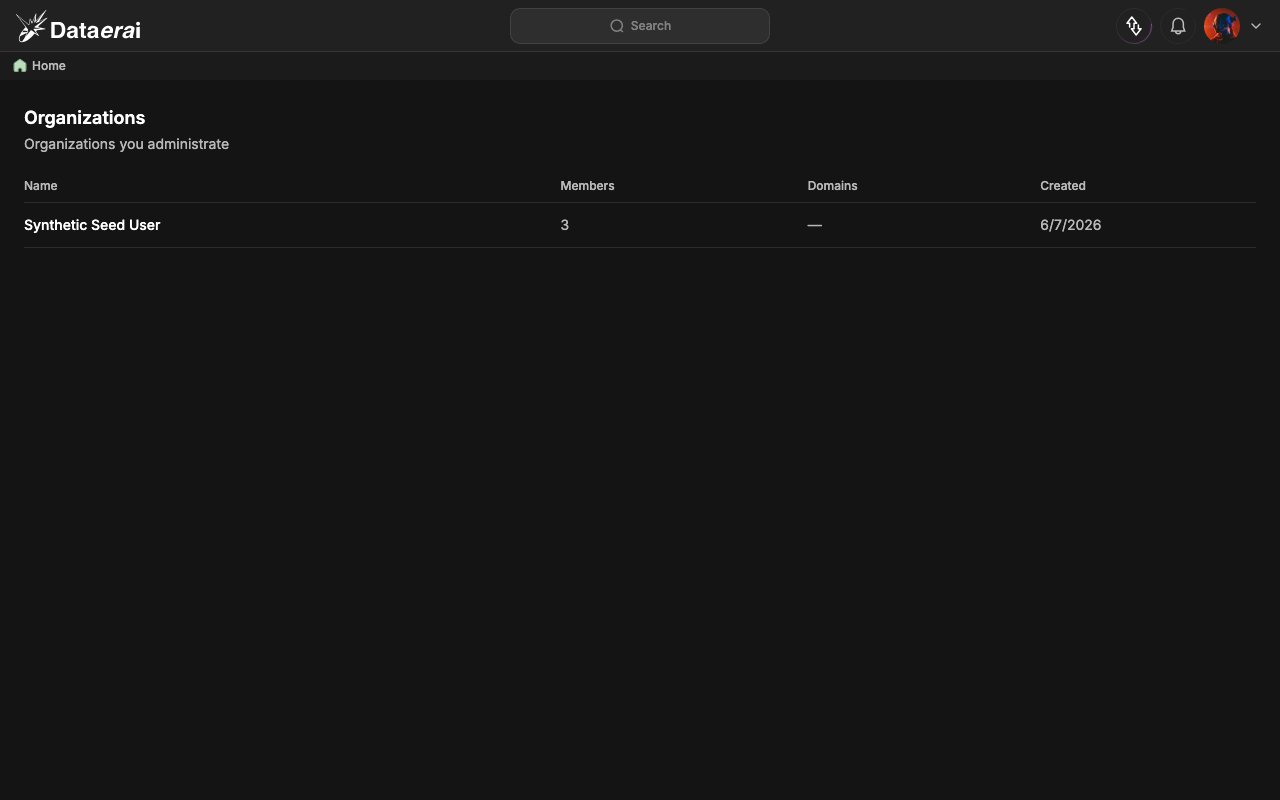
- Find the organization you administer.
- Add a second person.
- Create a group.
- Grant access to a group or individual.
- Understand Read, Write, and Admin roles.
- Organization admins manage members and groups from Settings.
- Sharing is controlled on projects, collections, and assets.
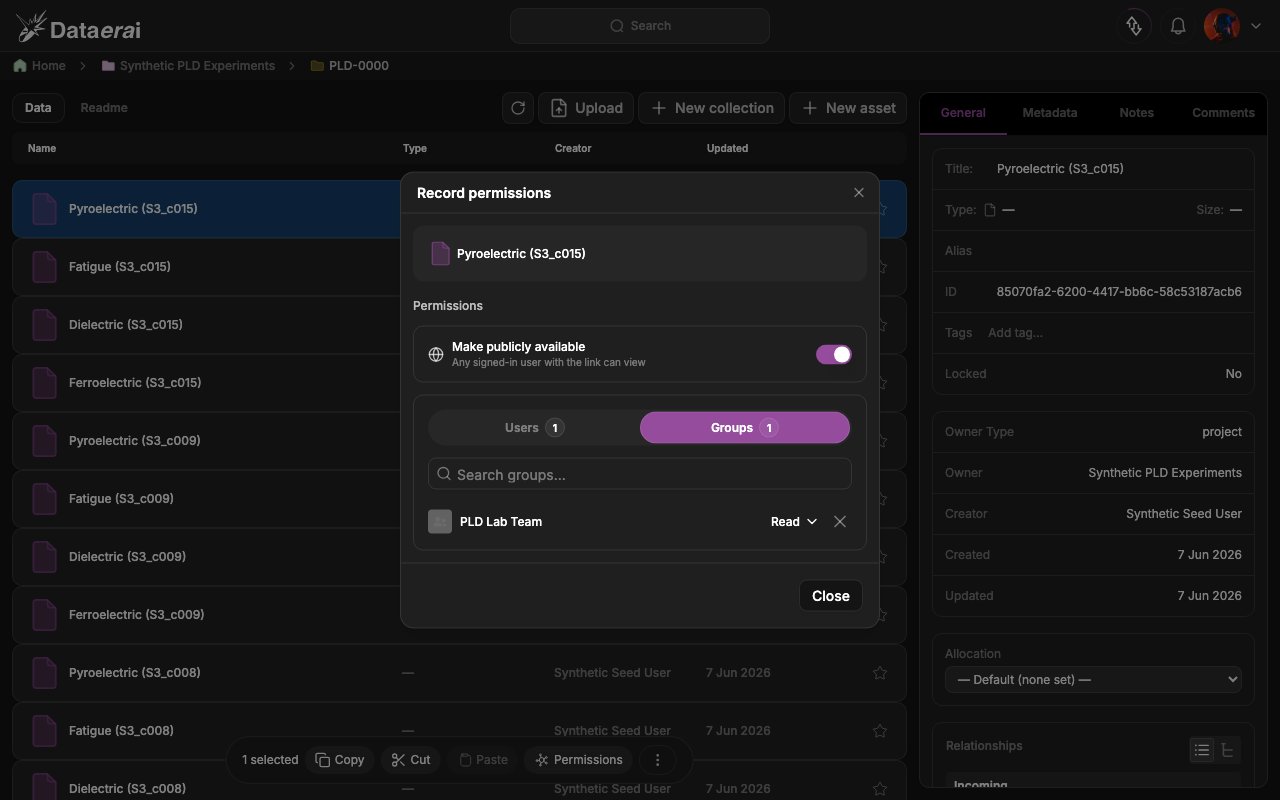
- Public access is read-only.
Reference docs: Permissions, Public access, People & groups.
Find your organization
Group creation and member management happen inside an organization, so first resolve the organization you administer. In the app- Open the user account menu in the top-right and choose Settings.
- In the Settings sidebar open Organizations to see the organizations you
belong to. The same orgs appear on the
/admin/organizationsadmin page (Name | Members | Domains | Created), where you administer the ones you own.
Technical details
Technical details
GET /api/me/ returns sole_organization_id and admin_organizations[];
GET /api/organizations/ lists the organizations you can administer.Add a second person
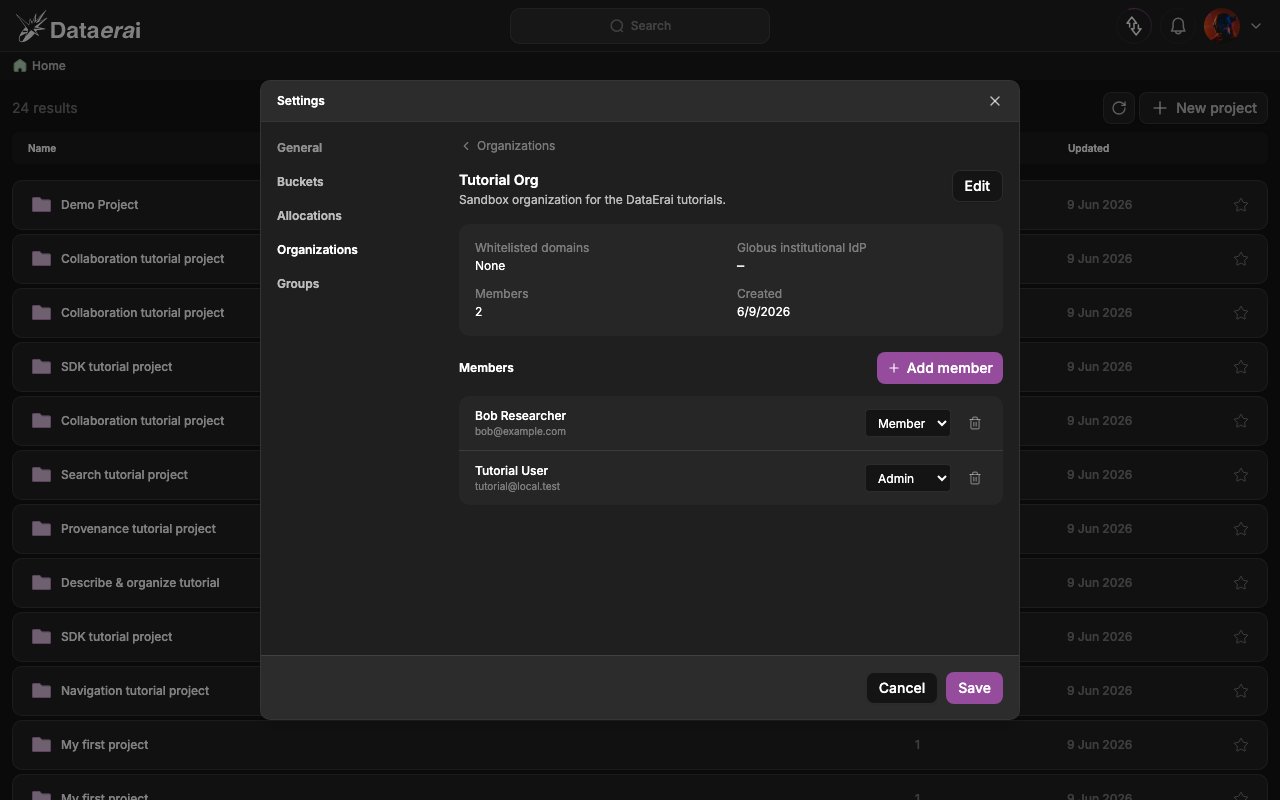
Collaboration needs at least two people. Ask the second person to sign up or sign in with Globus, then add them to your organization so they appear in people search and can join projects. In the app- Open your Dataerai site in a fresh/incognito window. On the sign-in screen,
click Sign up to reach
/signup. - Fill Full name, Email, Password, and Confirm password, then submit.
- Back in your main window, open the org at
/admin/organizations, click the org name, and use New member / add-by-email to add the new person (per-member role is member or admin).
Create a group and add the member
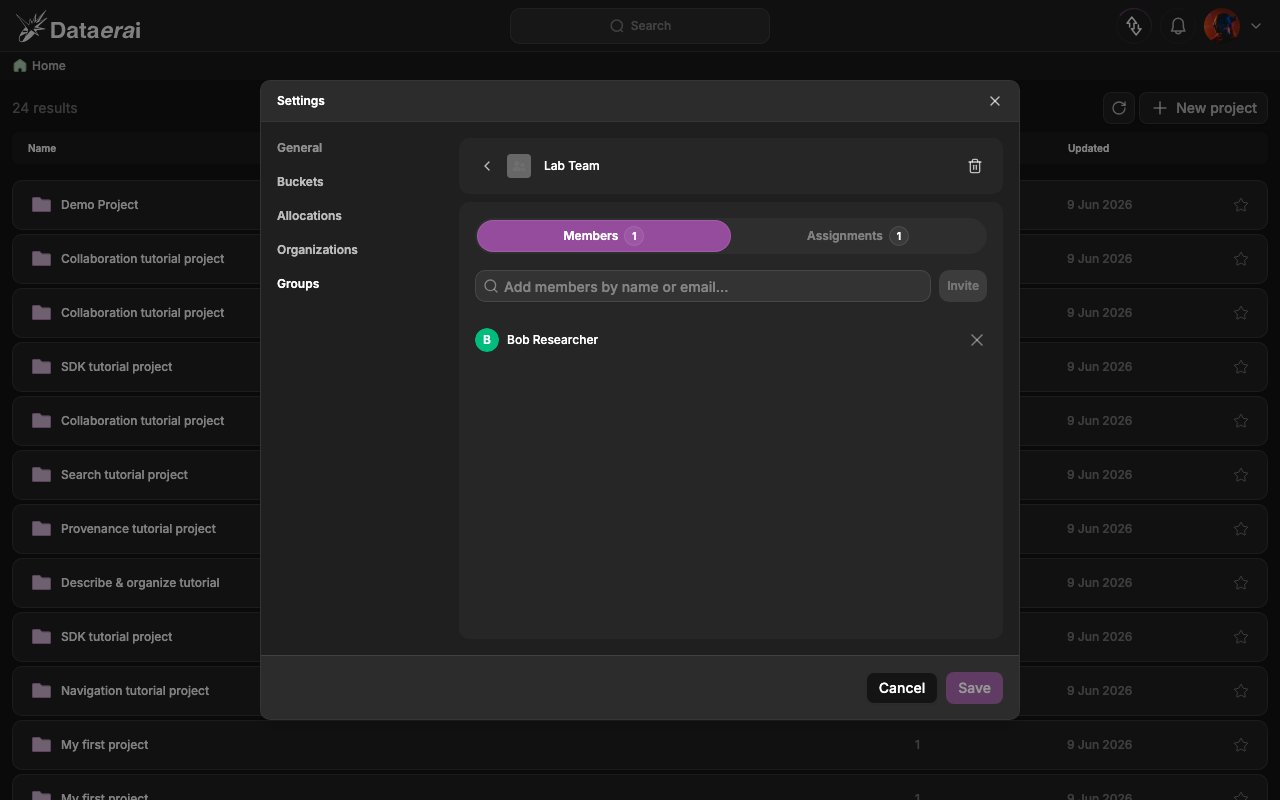
A group is a named bundle of users inside one organization. Grant a group access to an item once, and everyone in it gets that access. Creating a group and managing its members require org-admin of the target organization. In the app- Open the user account menu → Settings, then choose Groups in the sidebar.
- Click Add group (a draft named New Group opens); rename it, and if you belong to more than one org pick the org under Create in.
- In the group’s Members tab, type the second user’s name or email into the Add members by name or email… box, select them, and Save.
Technical details
Technical details
Use
POST /api/groups/ (name unique per organization), then
POST /api/groups/{id}/members/ with {"user_ids": [...]}. The member-add
call returns 204, so re-GET /api/groups/{id}/members/ to confirm.Roles & what each one grants
The sharing UI exposes three preset roles per object type — Read, Write, and Admin. Public access is always read-only.
Two roles are easy to conflate but are separate from these share-grant
presets: an organization membership role is member or admin, and a
project membership role is member, manager, or admin (these auto-create
Read / Write / full grants on the project).
Grant access to the group, a user, or the public
Permissions are granted to a person, a group, or the public. You must have Admin access on the object to share it. In the app- Close Settings, navigate into the project, and select the asset’s row.
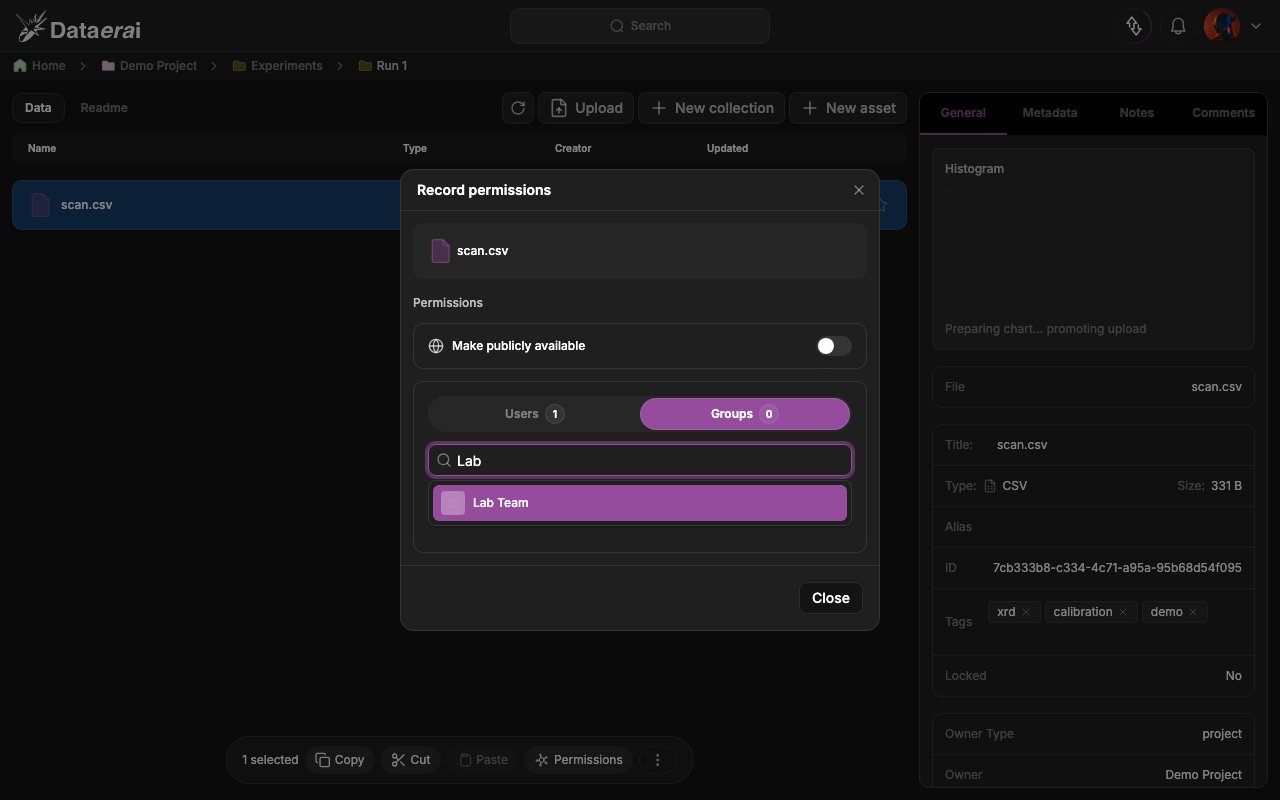
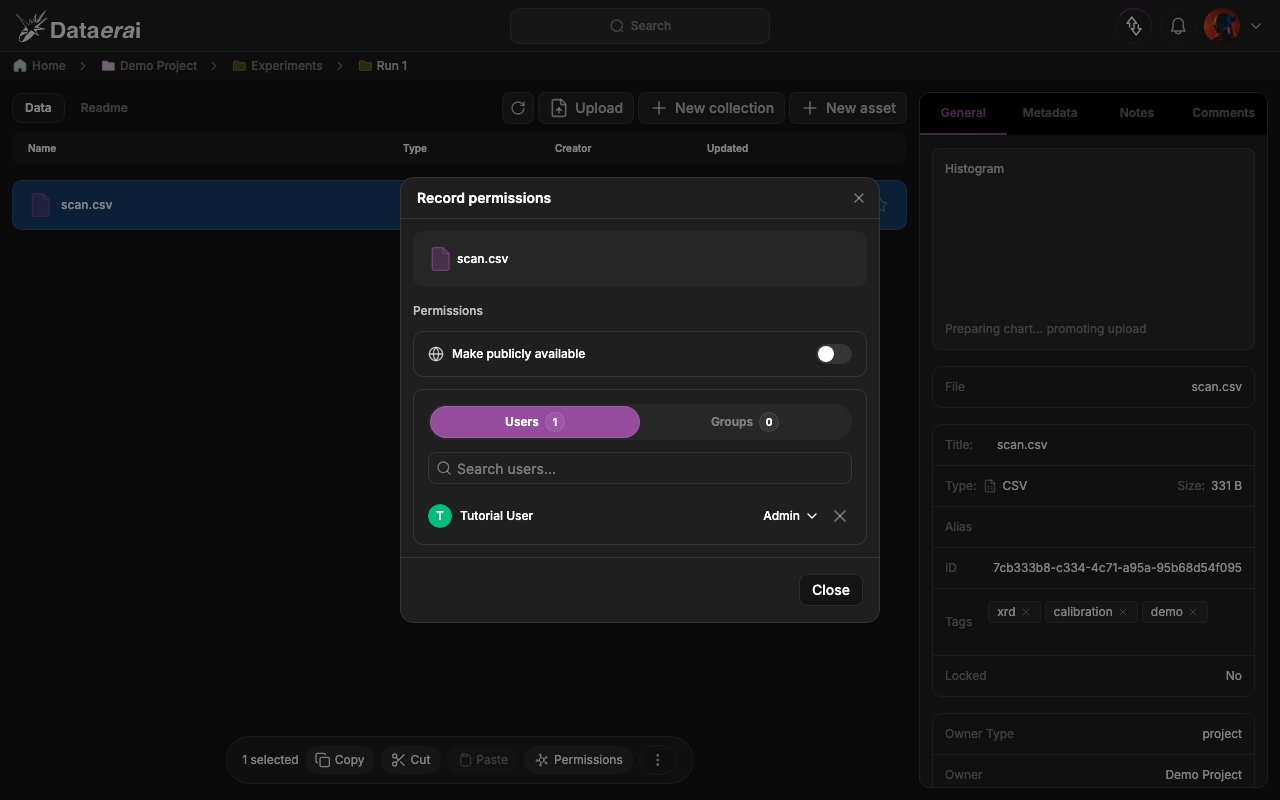
- In the bottom selection toolbar click Permissions to open the Record permissions modal.
- Use the Groups tab to search for Lab Team and add it, or the Users tab to add the second user; set each one’s role with the per-row dropdown (Read / Write / Admin). To publish, toggle Make publicly available (a public read-only grant).
Technical details
Technical details
These grants use the public permissions API.
Alternative paths
- Project membership —
POST /api/projects/{project_id}/members/with{"user_id", "role"}(member / manager / admin) adds someone to a whole project’s roster and auto-creates the matching grants across the project and its collections. The target user must belong to the project’s organization. - System-admin user management —
/api/admin/users/(SysAdmin only) can list, inspect, attach users to organizations, and flipis_active/is_system_admin. It cannot create users — signup is still the only way a user comes into existence.